Finishing a renovation project is exciting, but often leaves you facing a daunting cleanup task. Many homeowners and contractors focus on the renovation itself, overlooking the importance of efficient debris removal. A systematic post-renovation cleanout ensures your newly improved space is safe, clean, and ready to enjoy.
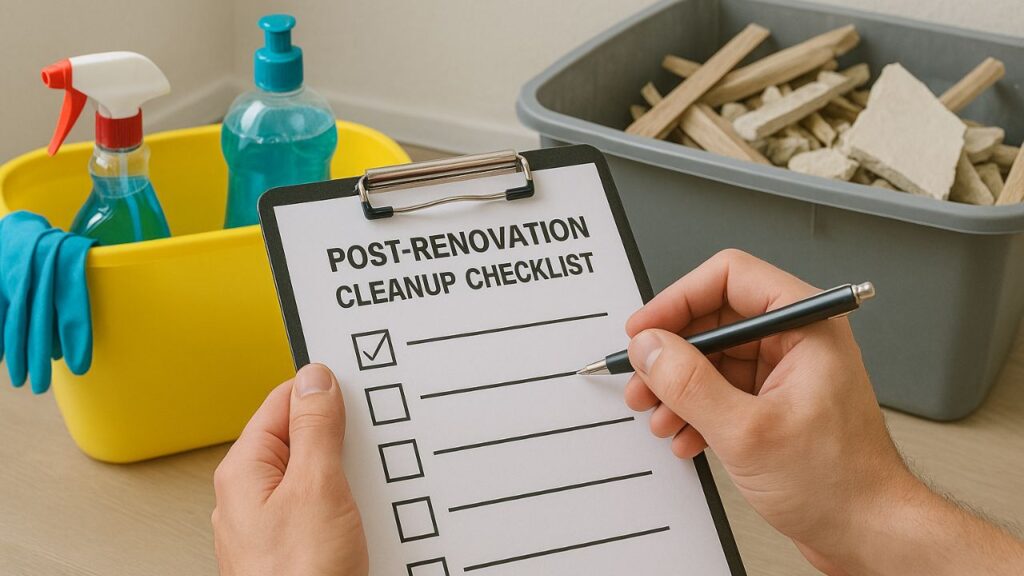
Planning Your Post-Renovation Cleanup
Before jumping into cleanup mode, taking time to plan your approach saves significant time and frustration. A well-organized cleanout prevents missed areas and ensures proper disposal of all materials.
| Cleanup Planning Essentials | Why It Matters | Preparation Tips |
| Safety assessment | Prevents injuries | Identify hazards before starting |
| Material categorization | Ensures proper disposal | Pre-sort by material type |
| Tool and supply inventory | Improves efficiency | Gather everything before starting |
| Timeline creation | Maintains momentum | Allow adequate time for each phase |
| Disposal arrangements | Prevents delays | Schedule pickups/deliveries in advance |
Starting with a comprehensive plan transforms an overwhelming task into a manageable process. According to the National Association of Home Builders, proper cleanup planning can reduce post-renovation cleanup time by up to 40%.
Safety First: Pre-Cleanup Assessment
Before handling any renovation debris, conducting a thorough safety assessment is crucial.
Safety Hazards Checklist
Start by identifying common post-renovation hazards:
- Sharp objects (nails, screws, broken glass, metal edges)
- Dust and particulates (especially concerning if lead or asbestos might be present)
- Unstable materials or partially completed work
- Electrical hazards from exposed wiring
- Slippery surfaces from spilled materials
- Chemical residues from paints, solvents, or adhesives
Safety Equipment Requirements
Based on your assessment, gather appropriate personal protective equipment:
- Sturdy work gloves (cut-resistant for sharp debris)
- Safety glasses or goggles
- Dust mask or respirator (N95 or better)
- Work boots with puncture-resistant soles
- Long sleeves and pants
- Hard hat if overhead hazards exist
- Knee pads for floor-level cleanup
Taking these precautions prevents injuries that could delay your enjoyment of the newly renovated space.
Debris Sorting and Categorization
Effective sorting makes the entire cleanup process more efficient and environmentally responsible. When comparing cleanup options like dumpster rental versus junk removal services, proper sorting matters regardless of your chosen disposal method.
Material Categories Checklist
Create separate collection areas for:
- Recyclable construction materials
- Clean wood
- Metals (copper, aluminum, steel)
- Cardboard and paper packaging
- Certain plastics
- Landfill-bound materials
- Treated or painted wood
- Composite materials
- Contaminated packaging
- General construction debris
- Hazardous materials (requiring special disposal)
- Paint and related products
- Solvents and adhesives
- Asbestos-containing materials
- Electronics and batteries
- Reusable materials
- Excess new materials
- Salvageable fixtures or hardware
- Removed items in good condition
Using clearly labeled containers for each category streamlines the sorting process and prevents having to resort materials later.
Room-by-Room Cleanup Process
A systematic approach ensures nothing gets overlooked. Working methodically through your renovation site prevents missed areas and improves efficiency.
General Space Cleanup Checklist
For each room or area, follow this sequence:
- Remove large debris first (demolition waste, packaging materials)
- Collect and properly dispose of all nails, screws, and small hardware
- Sweep or vacuum all surfaces, starting from the top (ceiling, walls) down to the floor
- Wipe down all surfaces to remove construction dust
- Check for and remove any adhesive residues or paint splatters
- Inspect for any missed debris in corners, under fixtures, and behind doors
Specialized Area Considerations
Different renovation areas present unique cleanup challenges:
Kitchen Renovation Cleanup
- Check inside cabinets for construction dust and debris
- Ensure all appliance spaces are clear of packaging materials
- Remove any plumbing or electrical debris from under sinks
- Clean ventilation grates and filters
Bathroom Renovation Cleanup
- Check drain traps for construction debris
- Remove any caulking residue or excess grout
- Clear ventilation fans of dust accumulation
- Ensure water lines are free of debris before using fixtures
Flooring Project Cleanup
- Check for adhesive residue along edges and transitions
- Remove any leftover padding or underlayment fragments
- Inspect for protruding nails or staples, especially along baseboards
- Clean subfloor thoroughly if partially completed
Managing Construction Dust
Construction dust is often the most challenging aspect of post-renovation cleanup. This fine particulate settles everywhere and can cause respiratory issues if not properly addressed.

Dust Removal Checklist
- Start with air management:
- Allow dust to settle before detailed cleaning
- Use air purifiers with HEPA filters
- Create cross-ventilation when weather permits
- Work from top to bottom:
- Clean ceiling fixtures, fans, and upper cabinets first
- Move to walls, windows, and door frames
- Finish with baseboards and floors
- Use appropriate tools:
- Microfiber cloths capture dust better than regular rags
- HEPA-filtered vacuum cleaners prevent recirculating dust
- Damp cleaning methods prevent dust from becoming airborne
- Don’t forget hidden areas:
- Inside light fixtures and vent covers
- Window tracks and door jambs
- Behind radiators and under appliances
- HVAC registers and return vents
Thorough dust removal prevents ongoing air quality issues and protects your health long after the renovation is complete.
Proper Disposal Methods
With debris sorted, you’ll need to implement the right disposal strategy for each category.
Disposal Options Checklist
- Standard construction debris:
- Dumpster rental for larger quantities
- Bagster-type services for smaller amounts
- Municipal drop-off if available in your area
- Recyclable materials:
- Construction material recycling centers
- Scrap yards for metals
- Local recycling programs for cardboard/paper
- Hazardous materials:
- Community hazardous waste collection events
- Specialized disposal facilities
- Retailer take-back programs (for items like batteries)
- Reusable materials:
- Donation to organizations like Habitat for Humanity ReStore
- Online marketplace selling or free listings
- Community reuse centers
For Peoria residents, specialized renovation debris removal services offer comprehensive solutions tailored to local disposal regulations.
Learn more: https://zapdumpsterspeoria.com/residential-rentals/renovation-debris-removal/
Cleaning Tools and Supplies Checklist
Having the right tools on hand makes your cleanup more efficient. Gather these supplies before starting:
Basic Cleanup Tools
- Heavy-duty trash bags and containers
- Broom and dustpan
- Shop vacuum with HEPA filter
- Microfiber dust cloths
- Bucket and mop
- Scrub brushes (various sizes)
- Putty knife for scraping
- Magnet tool for collecting nails and screws
- Extension pole for reaching high areas
Cleaning Solutions
- All-purpose cleaner
- Glass cleaner
- Degreaser for stubborn residues
- Adhesive remover
- Disinfectant for areas with water exposure
- Gentle abrasive cleaner for tough spots
Additional Specialty Items
- Grout cleaner (for tile projects)
- Wood cleaner (for cabinetry or flooring projects)
- Stone/countertop-specific cleaners
- Paint touch-up supplies
- Caulk for sealing any missed areas
Final Inspection Process
Before considering your cleanup complete, conduct a thorough final inspection to catch any overlooked issues.
Final Inspection Checklist
- Visual inspection:
- Check all surfaces in good lighting
- Look behind doors and inside cabinets
- Inspect ceiling corners and wall/floor transitions
- Examine under and behind appliances and fixtures
- Functionality testing:
- Test all drawers and doors for smooth operation
- Check that no debris is blocking moving parts
- Ensure ventilation systems are clear
- Verify plumbing drains freely with no leaks
- Safety verification:
- Confirm all electrical covers are installed
- Verify all sharp edges are addressed
- Ensure all tools and materials are removed
- Check that all temporary supports are removed
- Documentation:
- Take photos of properly cleaned areas
- Retain receipts for disposal and recycling
- Document any areas requiring contractor follow-up
- Note any items needing future attention
Special Considerations for DIY vs Professional Renovations
The cleanup approach differs slightly depending on whether your renovation was DIY or professionally done.
DIY Renovation Cleanup Tips
When you’ve handled the renovation yourself:
- Budget adequate time for cleanup (typically 15-20% of the total project time)
- Don’t rush the final phase—thorough cleanup prevents future issues
- Consider renting specialized cleaning equipment for best results
- Focus on dust management, as DIY projects often generate more dust
Professional Renovation Cleanup Expectations
When working with contractors:
- Review cleanup expectations in your contract
- Schedule a walk-through to identify any missed areas
- Request dust containment methods during the project
- Verify proper disposal of all materials, especially hazardous items
For either approach, a systematic cleanup ensures your renovation truly feels complete.
Post-Cleanup Maintenance
After the main cleanup, implement these practices to prevent lingering issues:
- Change HVAC filters frequently for 1-2 months following renovation
- Continue running air purifiers if dust seems persistent
- Watch for settling dust that may appear on surfaces in the weeks following cleanup
- Monitor for any odors that might indicate missed materials
- Check drains for slow drainage that could indicate debris buildup
Conclusion: Enjoying Your Newly Renovated Space
A thorough post-renovation cleanup transforms a construction zone back into a comfortable living space. While it requires effort and attention to detail, following this comprehensive checklist ensures nothing is overlooked.
By properly categorizing debris, addressing safety concerns, working systematically through each area, and implementing the right disposal methods, you’ll efficiently complete the final phase of your renovation project. With cleanup properly handled, you can fully enjoy your newly improved space with the satisfaction of a job completely done.
Post-Renovation Cleanout FAQs
How long should post-renovation cleanup take for an average room remodel?
For an average single-room renovation like a bathroom or medium-sized kitchen, thorough cleanup typically requires 4-8 hours of focused work. This includes debris removal, dust management, and final detailing. Larger renovations may require several days of dedicated cleanup time, especially when addressing multiple rooms or extensive dust issues.
What’s the best way to remove construction dust from soft surfaces like curtains and upholstery?
For soft surfaces affected by construction dust, start with thorough HEPA vacuuming using upholstery attachments. For washable items like curtains, launder according to care instructions. For non-washable upholstery, professional cleaning is often the most effective option, as they have specialized equipment for extracting fine dust particles embedded in fabrics.
Is it necessary to clean inside HVAC ducts after a renovation?
If proper dust containment measures were used during renovation (like sealing off vents and using dust barriers), duct cleaning may not be necessary. However, if you notice dust blowing from vents or if the renovation involved areas near HVAC components, professional duct cleaning is recommended to prevent circulating construction dust throughout your home for months afterward.
What should I do with leftover renovation materials that are still usable?
Leftover materials in good condition have several potential uses: store small amounts for future repairs, donate larger quantities to organizations like Habitat for Humanity ReStore, offer to neighbors via community groups, sell through online marketplaces, or return unopened items to suppliers (check return policies first). Keeping excess materials organized and accessible extends their usability.
How do I know if the dust contains hazardous materials that need special cleaning?
If your renovation involved a home built before 1978 (potential lead paint) or before 1990 (potential asbestos in various materials), you should assume dust may contain hazardous materials unless testing proves otherwise. In these cases, use HEPA filtration for cleaning, avoid dry sweeping, use damp cleaning methods, and consider professional testing or cleaning services for peace of mind.