Key Takeaways
- Planning fixture placement close to existing plumbing lines prevents costly rerouting and code violations that add weeks to your timeline
- Protecting rough-in valves and confirming compatibility before ordering trim saves you from tearing out new tile to fix mismatched fittings
- Estimating tile debris volume accurately—typically 10-20 cubic yards for a full bathroom—prevents overweight fees and rental extensions
- Separating recyclable metals and prohibited hazardous materials avoids contamination charges and maximizes disposal efficiency
- Coordinating permits, dumpster placement, and hauler restrictions up front eliminates surprise fees and project stoppages
Bathroom renovation projects fail most often when homeowners underestimate the complexity of fixture coordination and the sheer volume of demolition waste. A typical full bathroom remodel generates 10-20 cubic yards of tile, mortar, and fixture debris, while even minor plumbing layout changes can trigger inspection requirements and double your labor costs.[1]
Planning Plumbing Fixtures to Avoid Costly Rerouting
The most expensive bathroom remodel mistakes happen before you swing a hammer. Keeping your new fixture layout close to existing water supply lines and drain pipes prevents the need to reroute plumbing through walls and floors. Moving drain lines requires precise slope calculations, proper venting, and code-compliant rough-ins that most homeowners cannot execute without professional help.[2]
Toilets need approximately 15 inches of clearance from the centerline to adjacent walls and at least 21 inches of open space in front of the bowl. Ignoring these measurements leads to inspection failures and cramped, unusable bathrooms that feel smaller than their square footage suggests.[2] Shower valve rough-ins must be positioned at the correct height and depth before you install tile backer board, because correcting valve placement after waterproofing is installed means demolishing brand new surfaces.
Matching Fixtures to Your Existing Infrastructure
Choosing fixtures that align with your current plumbing and structural capacity saves you from expensive surprises. Heavy freestanding tubs and oversized vessel sinks can overload standard vanity cabinets or require floor reinforcement you did not budget for. Imported faucets with non-standard thread patterns often refuse to connect to American supply lines, forcing you to return products and delay installation.[3]
Verify rough-in dimensions for every fixture before ordering. Standard toilet rough-ins measure 12 inches from the wall to the drain center, but older homes may have 10-inch or 14-inch configurations that limit your product choices. Measuring twice and ordering once prevents the frustration of discovering your new toilet does not fit the existing drain location after you have already removed the old one.
When to Call a Licensed Plumber
DIY plumbing work creates the most regrettable bathroom remodel mistakes when homeowners tackle tasks beyond their skill level. Moving drain lines, soldering copper pipe, and installing custom shower systems require specialized knowledge and tools that most weekend warriors lack. Leaks hidden inside walls and failed inspections cost thousands to repair—far more than hiring a licensed plumber from the start.[3]
Even experienced DIYers should hire professionals for complex rough-in work, gas line connections, and any plumbing changes that require permits. Your local building department can tell you which tasks legally require licensed contractors in your jurisdiction. When budgeting your project, renovation debris removal services that include disposal planning help you allocate funds more accurately across labor and materials.
Demolition Mistakes That Damage Plumbing and Create Hazards
| Demolition Error | Consequence | Prevention Strategy |
|---|---|---|
| Failing to cap open drains after removing traps | Sewer gas fills living spaces | Use temporary drain covers or sealed rags, remove before reassembly |
| Rushing fixture removal without disconnecting supply lines | Cracked fixtures, broken pipes, damaged subfloors | Turn off water, drain lines completely, disconnect anchoring hardware first |
| Ignoring musty odors and soft subfloor spots | Hidden water damage worsens during project | Inspect behind walls and under fixtures before demo, fix leaks while open |
| Leaving outdated electrical wiring in wet zones | Safety hazards and code violations discovered late | Coordinate electrical upgrades with licensed electrician during demolition phase |
Rushing through demolition creates bathroom remodel mistakes that multiply repair costs and extend timelines. Failing to cap or cover open drain pipes after removing traps allows sewer gas to enter your home, creating health hazards and unpleasant odors that persist until you properly seal the openings. Many homeowners use temporary rags or plastic drain covers during demo, but forgetting to remove these before reassembly causes blockages that require reopening finished work.[4]
Removing tubs, toilets, and vanities without first disconnecting water supply lines, drain connections, and anchoring hardware damages fixtures you planned to donate or resell. More seriously, it cracks cast iron pipes hidden in walls and floors, breaks fragile drain fittings, and splits wood framing that was already weakened by decades of moisture exposure.[4] Taking an extra 15 minutes to methodically disconnect each component prevents damage that costs hundreds to repair.
Identifying Hidden Water Damage During Demolition
Demolition reveals problems that lurk behind walls and under floors. Musty odors, discolored subfloor sections, and corroded pipe fittings signal water damage that needs immediate attention. Ignoring these warning signs wastes the one opportunity you have to fix structural issues while everything is accessible. Replacing rotted subfloor and leaking drain fittings during demolition costs a fraction of what you will pay to tear out your brand new bathroom in two years when the uncorrected leak finally shows up as ceiling stains in the room below.[2]
Electrical systems in older bathrooms often fail to meet current code requirements for ground fault circuit interrupter (GFCI) protection in wet areas. Leaving outdated wiring in place instead of coordinating electrical upgrades during your remodel creates safety hazards that inspectors will flag before allowing you to close walls. Budget time and money for bringing electrical systems up to code when you plan your demolition timeline.
Estimating and Managing Tile Debris Volume
Underestimating the weight and volume of tile debris ranks among the most common bathroom remodel mistakes that lead to dumpster rental problems. A typical floor-to-ceiling tile removal in a standard 5-by-8-foot bathroom produces approximately 500-800 pounds of ceramic tile, mortar, and cement backer board. When you add fixtures, vanity cabinets, and damaged subfloor sections, total debris volume often reaches 2-4 cubic yards for a modest bathroom and 10-20 cubic yards for a complete gut renovation.[5]
Calculating debris volume requires measuring the square footage of surfaces you plan to remove and multiplying by the combined thickness of tile, adhesive, and substrate layers. Most installations stack a quarter-inch tile on top of half-inch cement board, creating three-quarters of an inch of material per square foot. Adding a 20 percent buffer for broken pieces, packaging waste, and unexpected discoveries prevents running out of dumpster capacity mid-project.[5]
Proper Loading Techniques for Heavy Materials
Concentrating tile, mortar, and cast iron fixtures at one end of your dumpster exceeds axle weight limits and container specifications, resulting in surcharges or refusal to haul. Distributing heavy masonry materials evenly across the dumpster floor keeps weight balanced and maximizes the volume you can fill before hitting tonnage caps. Most haulers allow 2-4 tons in a standard 10-yard dumpster, but dense tile and concrete debris can exceed limits at just 60-70 percent full.[5]
Breaking large tile sections into manageable pieces improves packing efficiency without creating hazardous dust clouds. Tossing full sheets of tile and backer board into the container leaves air pockets that waste cubic footage. Moderate size reduction—snapping 2-by-4-foot sections into 12-by-12-inch chunks—allows pieces to nest together and doubles the amount of material you can fit in the same container. Avoid creating fine tile dust by using controlled breaking techniques rather than pulverizing materials with sledgehammers.
Need Help Sizing Your Bathroom Remodel Dumpster?
Zap Dumpsters Peoria helps source the right container for your plumbing fixture and tile debris volume
Disposing of Fixtures and Prohibited Materials
Throwing metal plumbing components into mixed construction debris represents both a financial loss and a disposal error. Copper pipe, brass valves, and steel bathtubs have scrap value that offsets your project costs when you separate them for recycling. Many waste haulers offer reduced rates or rebates for properly sorted metal loads, while mixing metals with general debris forfeits this opportunity and may violate local recycling ordinances.[5]
Porcelain toilets, sinks, and ceramic tile often qualify for specialized recycling programs that divert materials from landfills. Tossing these items into household trash streams or contaminating green waste containers triggers rejection fees and complicates disposal. Checking with your local solid waste authority before demolition begins helps you identify drop-off locations and eligible materials for ceramic recycling programs.[5]
Hazardous Materials That Require Special Handling
Standard roll-off dumpsters cannot legally accept hazardous materials including asbestos-containing tile or mastic, lead-contaminated paint chips, chemical adhesives, and certain solvents. Homes built before 1980 frequently contain asbestos in floor tile, pipe insulation, and ceiling textures. Disturbing these materials without proper testing and abatement creates health risks and legal liability that far exceed the cost of professional hazardous material removal.[5]
Failing to ask your hauler about weight limits for masonry loads creates one of the most expensive bathroom remodel mistakes at pickup time. Tile, mortar, and concrete subfloor demolition generates dense, heavy debris that reaches tonnage caps before filling container volume. Most haulers charge overweight fees starting at two to four tons, depending on container size. Confirming weight policies when you order prevents surprise charges that can add $100-300 to your disposal costs.[5] Understanding common disposal errors in renovation projects helps you avoid these preventable surcharges.
Coordinating Permits, Placement, and Local Regulations
Skipping permit verification for both your bathroom remodel and dumpster placement leads to work stoppages and fines that halt progress for weeks. Most municipalities require building permits for plumbing changes, electrical modifications, and structural alterations. Homeowners associations often mandate approval for placing containers in driveways or on street parking, with application timelines that stretch 5-15 business days. Starting your project without confirming permit requirements invites enforcement actions that force you to undo completed work.[2]
Dumpster placement affects both project efficiency and property protection. Positioning containers too far from bathroom access points encourages messy staging piles and increases labor time spent carrying debris. Placing heavy dumpsters on weak pavement, decorative concrete, or over septic system components causes damage that costs more to repair than your entire disposal budget. Most haulers provide plywood protection boards for driveways, but you must request this service when ordering.[5]
Confirming Hauler Restrictions Before Loading
Every waste hauler enforces different policies regarding acceptable materials, weight limits, and loading practices. Not confirming what your specific company allows for tile weight, plumbing fixtures, drywall, and daily tonnage caps creates the “extra fee surprise” that frustrated homeowners complain about at pickup. Reading your rental agreement and asking questions before you sign prevents misunderstandings about overage charges, prohibited items, and extension fees.[5]
According to licensed plumbing professionals, the majority of expensive bathroom renovation mistakes stem from inadequate planning rather than execution errors. Taking time to measure fixture clearances, verify rough-in dimensions, estimate debris volume, and understand disposal regulations prevents the rework and delays that transform a three-week project into a three-month ordeal.
Fixture Protection and Waterproofing Requirements
| Protection Area | Best Practice | Mistake to Avoid |
|---|---|---|
| Rough-in valves during demolition | Cover with plastic caps and protective padding | Leaving valves exposed to tile dust and impact damage |
| Shower pan waterproofing | Install membrane before tile, test drain slope with water | Tiling over compromised substrate without moisture barrier |
| Drain compatibility verification | Confirm new trim matches existing valve brand before ordering | Assuming all trim kits work with any valve manufacturer |
| Subfloor moisture damage | Drain toilets and sinks completely before removal | Leaving water in bowls and traps that spills during demolition |
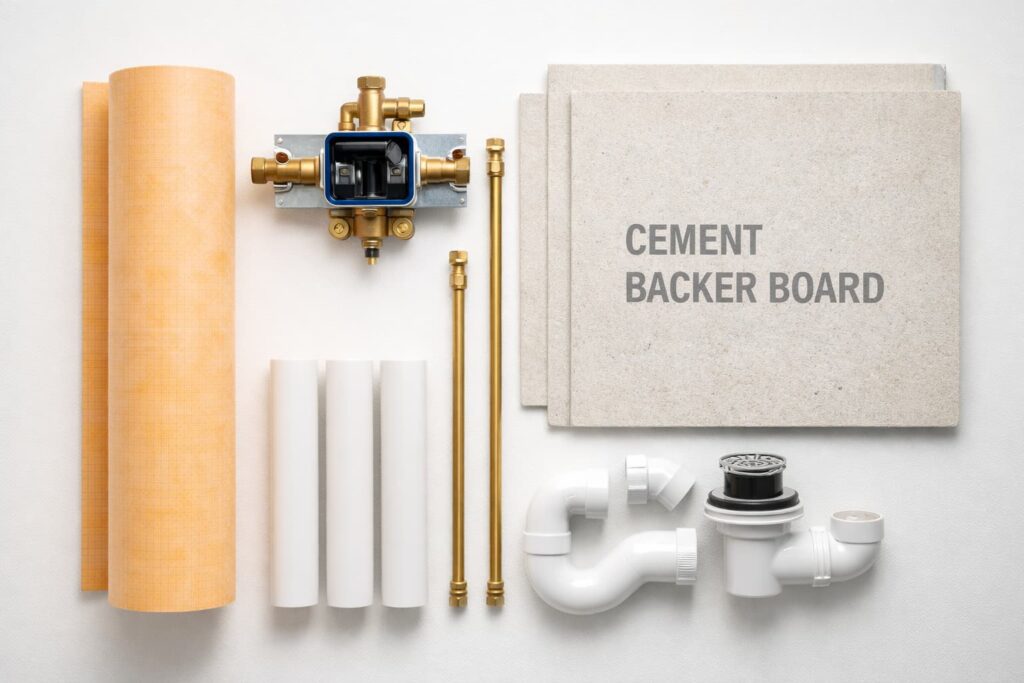
Protecting remaining plumbing components during demolition prevents one of the most frustrating bathroom remodel mistakes. Covering rough-in valves with plastic sheeting or heavy blankets shields precision fittings from tile dust and impact damage that makes them unusable when you are ready to install trim. Leaving valves exposed during aggressive demolition often scratches threads and damages internal seals, requiring complete valve replacement after you have already waterproofed walls.[6]
Never assume you can “save money” by reusing old supply pipes and drain fittings that show corrosion or mineral buildup. Disturbing corroded connections during fixture replacement frequently causes leaks that appear within days of completing your project. The cost of opening finished walls to replace a 50-cent brass fitting that failed dwarfs the price of installing new supply lines during the initial renovation. Fresh connections provide decades of trouble-free service and eliminate the risk of water damage to your new finishes.
Waterproofing Membranes and Substrate Preparation
Installing tile over compromised subfloor or skipping waterproof membranes creates the most catastrophic bathroom remodel mistakes that manifest months after completion. Water migrating through grout lines and tile seams rots wood framing, grows mold colonies, and causes structural damage that requires demolishing your entire installation. Products like RedGard liquid membrane and Schluter Kerdi systems provide code-compliant moisture barriers that protect framing from the inevitable water exposure in shower and tub areas.[6]
Testing shower pan slope before installing tile catches drainage problems while repairs remain simple. Pouring several gallons of water across the pan surface should show water flowing steadily toward the drain at a minimum quarter-inch drop per foot of horizontal distance. Flat spots where water puddles indicate insufficient slope that will cause standing water and slow drainage after you install tile. Correcting slope issues requires adding thin-set mortar or self-leveling compound—a 30-minute fix before tiling that becomes a complete demolition project afterward.
Avoiding Design and Material Selection Errors
Coordinating finishes and fixture sizes prevents aesthetic bathroom remodel mistakes that homeowners regret for years. Oversized vanities in compact bathrooms consume floor space needed for comfortable movement, while mixing too many metal finishes—black faucets with brass hardware and chrome light fixtures—creates visual chaos rather than intentional design. Most successful bathroom renovations limit finish selections to two complementary metals and one dominant color palette.[7]
Choosing proper fixture scale for your room dimensions affects both function and appearance. A 60-inch double vanity in a 5-by-8-foot bathroom leaves insufficient clearance for the toilet and shower entry. Standard building codes require minimum clearances, but comfortable bathrooms provide generous spacing that makes daily use pleasant rather than cramped. Measuring your existing layout and marking proposed fixture locations with painter’s tape on the floor reveals space conflicts before you order expensive products.
Balancing Budget and Quality in Material Selection
Bargain fixtures and discount tile often cost more in the long term when premature failures require replacement within a few years. Builder-grade faucets with plastic valve cartridges leak and drip after minimal use, while low-quality glazed tile chips and cracks under normal bathroom conditions. Investing in mid-grade fixtures with brass internals and porcelain or natural stone tile rated for wet areas provides the best value combination of initial cost and service life.
That said, you can strategically reduce costs on items that matter less to performance. Decorative wall tile, paint colors, and accessory hardware allow budget savings without sacrificing the reliability of critical plumbing components and structural waterproofing. Experienced contractors recommend spending 40-50 percent of your fixture budget on the shower valve, toilet, and vanity faucet, then allocating remaining funds to finishes and decorative elements.
Timeline Planning and Contractor Coordination
Unrealistic timeline expectations create stress and force bathroom remodel mistakes when homeowners pressure contractors to skip essential steps. A typical full bathroom renovation requires 3-5 weeks from demolition through final trim installation, assuming no major structural surprises or special-order fixture delays. Attempting to compress this schedule by eliminating inspection steps or rushing waterproofing cure times virtually guarantees costly failures within months of completion.
Coordinating multiple trades—plumbers, electricians, tile installers, painters—requires buffer time for inspections and material deliveries. Most building departments need 24-48 hours to schedule rough-in inspections, while special-order fixtures often require 4-8 weeks for delivery. Starting your project with realistic timeline expectations and built-in flexibility for delays prevents the panic decisions that lead to poor workmanship and code violations.
Managing the Living Situation During Renovation
Losing access to your only bathroom creates practical challenges that affect project quality when families pressure contractors to rush work for convenience. Planning temporary bathroom arrangements before demolition begins—whether using a second bathroom, staying with relatives during critical phases, or renting a portable toilet for extensive renovations—allows your contractor to work methodically without daily complaints about inconvenience.
Dust and noise from bathroom demolition affect your entire home, particularly in multi-story houses where debris must traverse hallways and stairs. Protecting floors with ram board or hardboard sheets, sealing doorways with plastic sheeting, and scheduling the loudest work during midday hours when family members are absent minimizes disruption. These accommodations cost little but preserve relationships and let contractors focus on quality rather than managing household complaints.
Conclusion: Planning Prevents Most Bathroom Renovation Errors Near You
The vast majority of bathroom remodel mistakes stem from inadequate preparation rather than execution failures. Taking time to verify fixture dimensions, estimate debris volume accurately, understand disposal regulations, and coordinate permits before starting demolition prevents the expensive rework and delays that plague rushed projects. Keeping plumbing layouts close to existing infrastructure, protecting rough-in valves during demo, and installing proper waterproofing membranes provides the foundation for a successful renovation that serves your family for decades.
Your bathroom size, scope of plumbing changes, and tile removal volume directly impact the container size and disposal strategy that makes sense for your project. Getting expert guidance on debris estimation and hauler restrictions up front eliminates the surprise fees and rental extensions that inflate budgets. A methodical approach to planning, combined with realistic timeline expectations and quality material selection, transforms a stressful renovation into a manageable project with results you will appreciate every day.
Bathroom Remodel Mistakes FAQs
What is the most common bathroom remodel mistake that causes leaks?
The most common bathroom remodel mistake that causes leaks is failing to install a proper waterproof membrane behind shower and tub tile before setting the tile. Water migrates through grout lines and saturates the substrate, causing rot and mold that requires complete demolition to repair.
How do I avoid bathroom remodel mistakes when estimating debris volume?
Avoid bathroom remodel mistakes in debris estimation by measuring the square footage of surfaces you are removing, multiplying by the combined thickness of materials, and adding 20 percent buffer for broken pieces and surprises. Most full bathroom renovations generate 10-20 cubic yards requiring proper container sizing.
What bathroom remodel mistakes happen most often with fixture placement?
The most frequent bathroom remodel mistakes with fixture placement involve moving plumbing too far from existing lines and ignoring minimum clearance requirements. Toilets need 15 inches from centerline to walls and 21 inches of front clearance for code compliance and comfortable use.
Can I avoid bathroom remodel mistakes by doing my own plumbing work?
DIY plumbing creates more bathroom remodel mistakes when homeowners attempt complex tasks like moving drain lines or soldering copper without proper skills and tools. Hiring licensed plumbers for rough-in work prevents leaks inside walls and failed inspections that cost thousands to correct.
What bathroom remodel mistakes lead to dumpster rental problems?
Common bathroom remodel mistakes with dumpsters include underestimating tile and mortar weight, mixing prohibited hazardous materials with construction debris, and failing to confirm hauler restrictions before loading. These errors result in overweight fees, contamination charges, and rental extensions that inflate disposal costs significantly.
Bathroom Remodel Mistakes Citations
- New South Waste Management. “Bathroom Remodel Cleanup: Dumpster Rental Tips and Tricks.” https://newsouthwaste.com/bathroom-remodel-cleanup-dumpster-rental-tips-and-tricks/
- HRI Plumbing. “Plumbing for Bathroom Renovation: Tips and Best Practices.” https://hriplumbing.com/blog/plumbing-for-bathroom-renovation
- Aquarina Plumbing. “The Most Common Plumbing Fixture Mistakes in Home Renovations.” https://www.aquarina.ca/the-most-common-plumbing-fixture-mistakes-in-home-renovations/
- Texas Disposal Systems. “How to Demo a Bathroom.” https://www.texasdisposal.com/blog/how-to-demo-bathroom/
- New South Waste Management. “Bathroom Remodel Cleanup: Dumpster Rental Tips and Tricks.” https://newsouthwaste.com/bathroom-remodel-cleanup-dumpster-rental-tips-and-tricks/
- Perplexity AI Overview Research on Bathroom Remodel Best Practices (User-provided research data)
- Jasmine Roth Design. “Don’t Make These 11 Bathroom Remodel Mistakes.” https://www.jasmine-roth.com/blogs/design-build/private-don-t-make-these-11-bathroom-remodel-mistakes